
My Battle with Carpenter Bees in Our Pine Timber Frame Home
HOME MAINTENANCEPRODUCT REVIEWSHOW TO GUIDE


Unwanted Guests in Our Dream Home
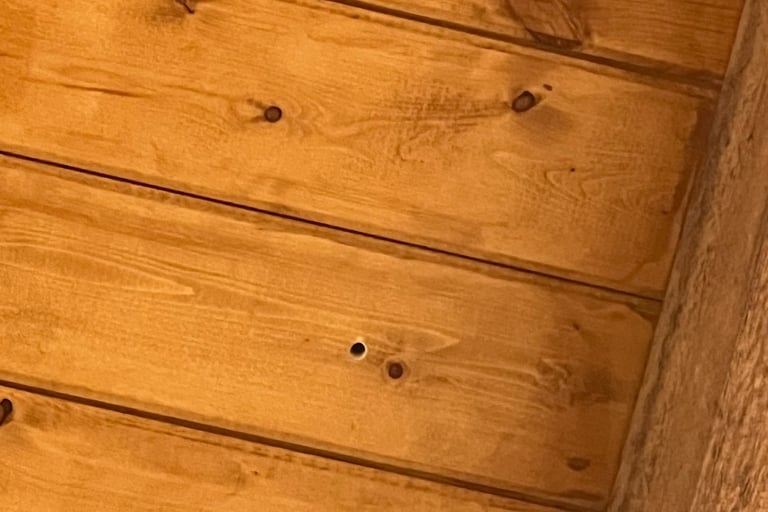
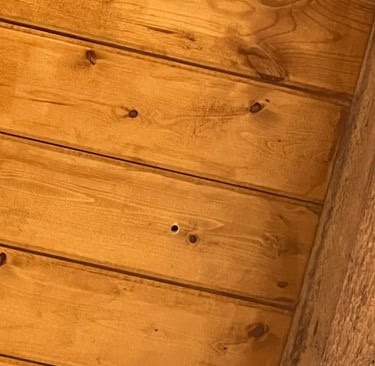
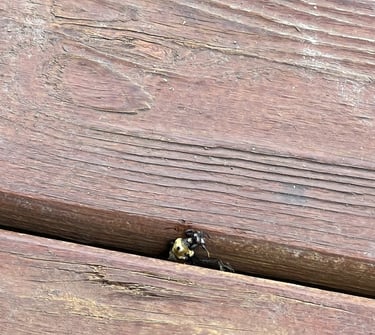
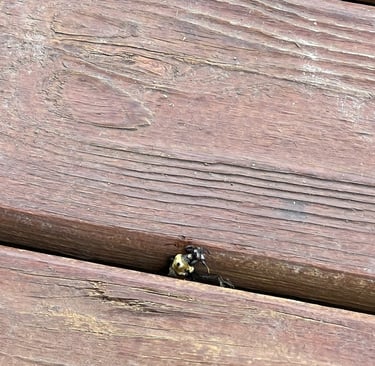
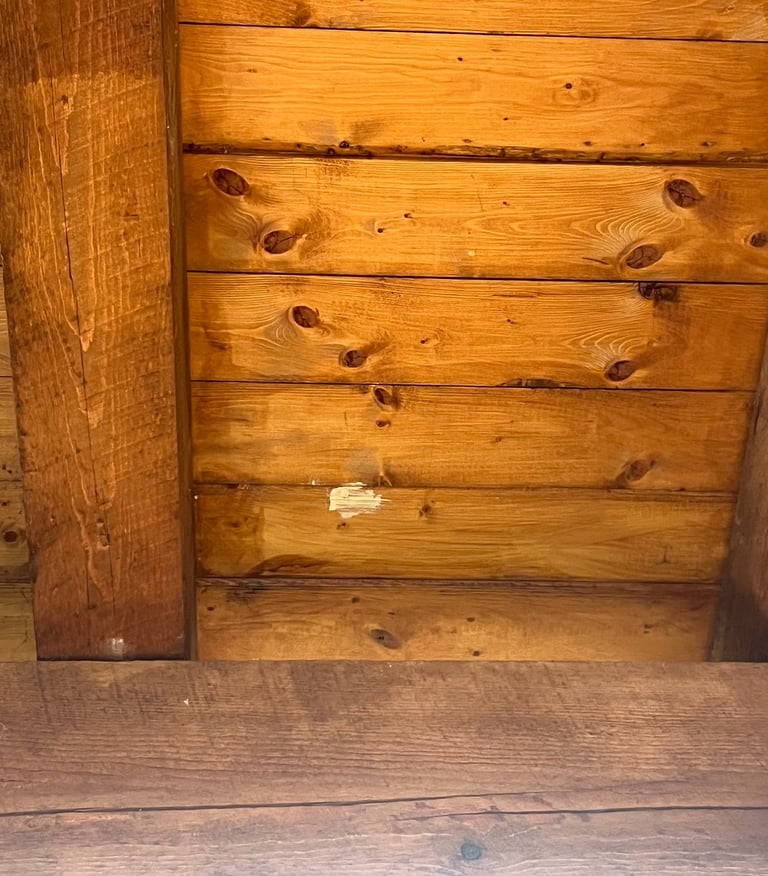
When RC and I built our dream pine timber frame home in Indiana, we hadn’t anticipated sharing it with carpenter bees. Yet within the first spring, we noticed something unsettling: sawdust appearing all over our deck, the grill, and outdoor furniture. Upon further inspection we began seeing perfectly round ½-inch holes appearing in our beautiful pine beams and decking. The buzz around our porch wasn’t just the sound of nature –we had a carpenter bee problem. I’ve been on a personal mission to protect our new home from these wood-boring bees. In this post, I’ll share my first-hand experience in hope it helps other homeowners facing the same struggle.
"I realized that by the time you see multiple holes and hear constant buzzing, you’re likely dealing with established nests that need direct treatment. My tactics were too little, too late, so I geared up for a more hands-on battle."
Why Carpenter Bees Love Pine (And Our Reluctance to Paint)
It turns out our home’s rustic charm was a big part of the problem. Carpenter bees love weathered, untreated softwoods like pine, cedar, and cypress. The natural texture of rough-cut pine beams – with all their grooves and grain – is very inviting to these bees looking for a nest site. In our case, the exterior timber wasn’t painted, only stained to preserve that warm wood look. Unfortunately, staining doesn’t deter carpenter bees at all. Experts note that well-maintained painted wood is “rarely attacked” by carpenter bees, whereas raw or just stained wood is highly attractive to them. Painting creates a hard barrier that bees prefer not to chew through.
We considered painting the entire timber frame to prevent the damage. It would likely have stopped the bees – they won’t chew through paint – but we ultimately decided against it. Why? We love the natural wood appearance and didn’t want to cover up the grain with opaque paint. Secondly, painting and then having to re-paint large beams every few years for maintenance is expensive. So, we chose to stick with stain for now, accepting that our lovely pine finish might mean more vigilance against bees. It’s a compromise many log or timber homeowners face: aesthetics vs. pest prevention. In our case, the beauty of the wood won out – which meant I had to figure this out.
Early Attempts: Learning the Hard Way
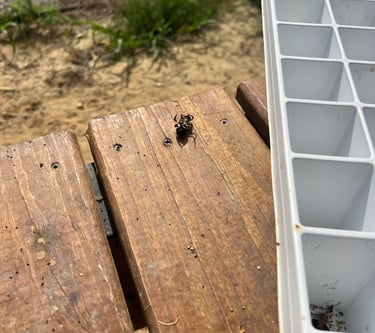
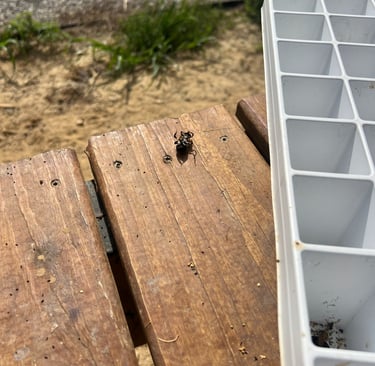
I’ll admit I was caught off guard and a bit naïve at first. I spotted a few bees hovering around and found a couple of starter holes. My initial reaction was, maybe they’ll just go away? I ignored the problem for the first summer. The following summer it was evident they were not going away. I tried a few quick fixes and “natural” remedies, but I had let it go too long and now we had a big problem.
Filling Holes Too Soon: One mistake I made early on was filling the bee holes as soon as I saw them. I would plug the entrance with wood filler immediately after spraying some off-the-shelf insecticide spray inside. I learned later that this was counterproductive – if any larvae or adults were still inside, they could just chew out a new path or remain sealed in the wood to emerge later. More research told me that experts recommend not sealing tunnels right away. Instead, you should wait at least 24-48 hours after treatment to ensure all bees inside are killed. I likely trapped a few live ones in that first round, only to have them bore out again later.
Gentle “Bee-Friendly” Deterrents: I experimented with some gentler, natural deterrents. I hung a fake wasp nest (just a crumpled brown paper bag) under the eaves, since folklore says carpenter bees avoid areas with wasps. I also sprayed a citrus-oil solution around the beams after reading that they dislike strong scents. (One popular tip is using citrus or almond oil; female carpenter bees supposedly avoid wood that smells like citrus or almond. Additionally, I set out a carpenter bee trap – a small wooden box with angled holes leading into an unescapable trap. The idea is that bees enter the holes, then get trapped in the box and die.
Did these natural methods work? It was hard to tell. The bees seemed unfazed by the fake wasp nest (maybe our Indiana bees are braver than most!). The citrus oil spray smelled great, but I still saw bees investigating the wood soon after. The trap caught a few males, but it wasn’t exactly filling up rapidly. Research suggests these approaches can help – for example, well-placed traps can indeed reduce carpenter bee numbers over a season, and certain oils may discourage new nesting – but we were beyond discouragement we had an active infestation. I realized that by the time you see multiple holes and hear constant buzzing, you’re likely dealing with established nests that need direct treatment. My tactics were “too little, too late,” so I geared up for a more hands-on battle.
The Battle Plan: Delta Dust at Dusk
Frustrated by new holes appearing, I dug deeper into research and advice from pest control experts. A consensus emerged: the most effective DIY solution for active carpenter bee infestations is insecticidal dust, applied directly into the bee’s tunnels. Unlike surface sprays that only last a couple of weeks, a proper dust treatment can remain effective for months inside the wood, killing not just the adult bees but also the larvae in the galleries. I decided to use Delta Dust, a popular brand of pyrethroid insecticidal dust (deltamethrin is the active ingredient - a link the exact one we used is below*).
Timing – Evening Ambush: I waited for the right evening to launch my counterattack. Carpenter bees are most docile at night, ideally just after sunset when they’ve retreated into their tunnels for the evening. Treating the holes at dusk significantly increases your odds of hitting all the bees while they’re “at home,” and it also minimizes the chance of getting buzzed by aggressive males guarding the entry. So, one calm evening, I suited up: long sleeves, gloves, safety goggles, and an N95 mask (you don’t want a face full of insecticidal powder). Armed with a ladder and a puffer duster (the kind used for diatomaceous earth or pest control dusts - also linked below*), I went hole to hole around the house.
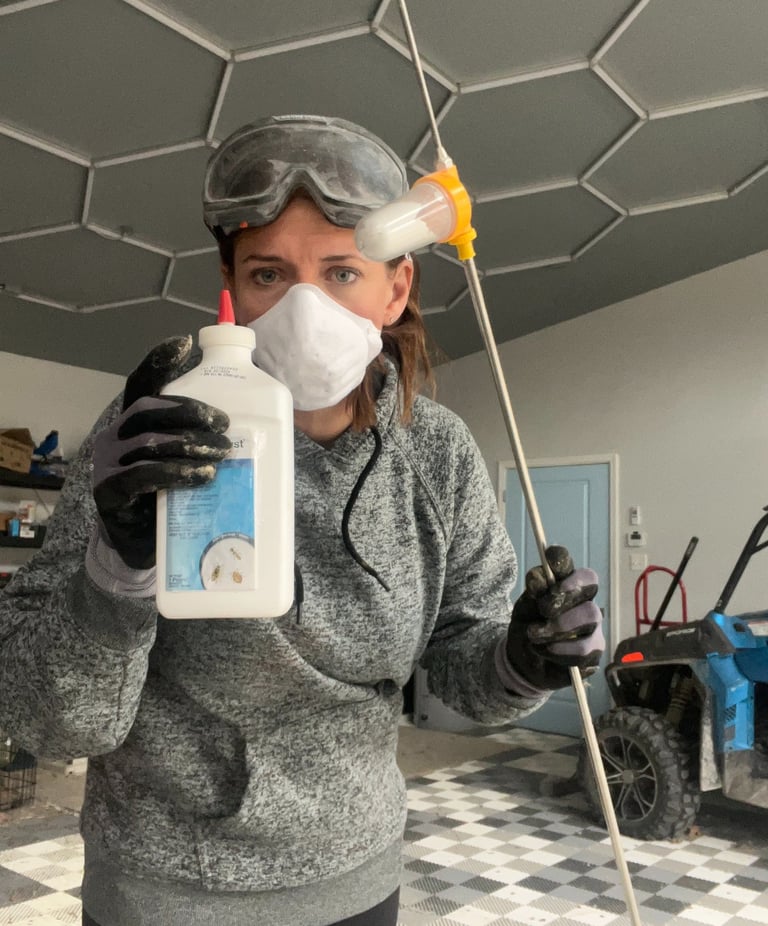
Dusting Each Nest: For each carpenter bee hole I found, I inserted the duster’s nozzle and gave a few firm puffs of Delta Dust. A little puff goes a long way – the goal is to coat the inside of the gallery lightly, not to pack it full. The dust is a fine powder that clings to the tunnel walls. As the bees move around inside, they get it on their bodies. Delta Dust doesn’t kill instantly on contact, but it’s very effective within hours. It’s a residual insecticide that the bees pick up and carry deeper into the nest, eventually killing larvae and adults alike through exposure and ingestion. I made sure to dust at least twice per hole, going back to give each one another puff, to ensure good coverage. The whole process felt a bit like a covert military operation – attacking under cover of dusk, targeting each enemy bunker (in this case, our porch timbers and pine decking!).
That first night of dusting was oddly satisfying. The next morning, I found the evidence of success: several dead carpenter bees on the ground below their former holes. Over the next week, I spotted fewer and fewer live bees around the area. It seemed the Delta Dust was doing its job brilliantly. In fact, these insecticidal dusts continue working for a long time inside the tunnels – one application can remain potent for many months, even up to a year. That gave me peace of mind that any newcomers poking around old galleries might also meet the same fate.
Breaking Up the Nest: The Coat Hanger Trick
After giving the dust some time to work, I moved to the next phase: digging out the enemy. Carpenter bees create multi-chambered nests inside the wood – after drilling the entry hole, the tunnel turns and extends, with several brood cells partitioned off inside for their young. Those partitions are usually made of chewed wood pulp and can block dust from spreading fully through the tunnel. To make sure I got every last larva, I employed a simple but effective tool: a straightened wire coat hanger.
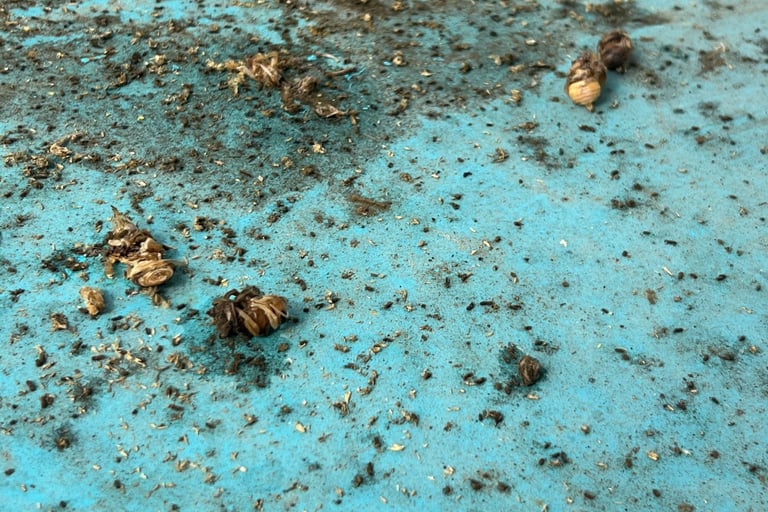
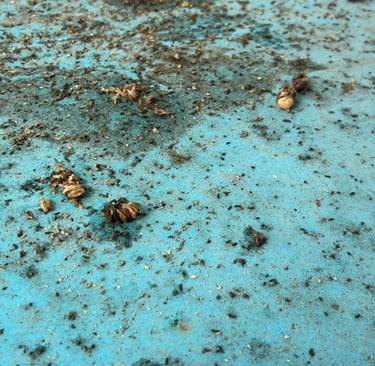
A few days after dusting, I returned to each hole with a wire hanger that I had unwound into a long, flexible rod. I carefully inserted it into each tunnel, probing and scraping the sides. This coat hanger trick let me break up the bees’ internal walls (the pollen plugs and mud partitions) and stir the dust deeper into the nest. Pest control pros recommend doing this kind of tunnel cleaning to ensure the insecticide reaches all the brood cells. It also helps clear out any debris. In my case, it did something else too – it brought out visible proof of the carnage. As I twisted the wire inside one particularly deep tunnel, I felt it hit and break through those internal chambers. When I pulled the hanger out, along with it came a grotesque mix of pulverized wood, pollen clumps, and dead carpenter bee larvae. A few larger bee bodies fell out as well. It was not a pleasant sight, but it was evidence that my two-step approach had worked. The adult bees had succumbed to the dust, and their offspring were not going to survive to continue the cycle.
For thoroughness, I gave each tunnel another quick puff of Delta Dust after reaming it with the hanger. It’s a bit labor-intensive, but extremely effective. I was shocked to find baby carpenter bees even weeks after dusting! By getting the dust into every nook and cranny of the gallery, I was essentially wiping out the current generation and booby-trapping the nest for any future bees that might wander in.
Fall Cleanup: Filling Holes and Repairing the Wood
With the active infestation taken care of, I turned my attention to repairing the damage. By late summer or early fall, carpenter bee activity dies down (in Indiana, the season typically winds down by October. This is the time I choose to do maintenance on the wood – once I’m confident no more bees are going in and out of those holes.
Filling the Tunnels: I filled each bee hole to prevent it from becoming a welcome sign for next year’s queens. There are a few ways to do this. I decided on a good exterior wood filler or wood putty. Using a putty knife, I pack the filler into the entry hole, making sure it goes as deep as possible. Some people use wooden dowels or cork plugs to cap the holes; the key is simply sealing off the tunnel so it can’t be reused. (Important: Only do this after you’re sure the bees inside are dead or gone – sealing too early can trap live bees, which might chew their way out or just rot and attract other pests.)
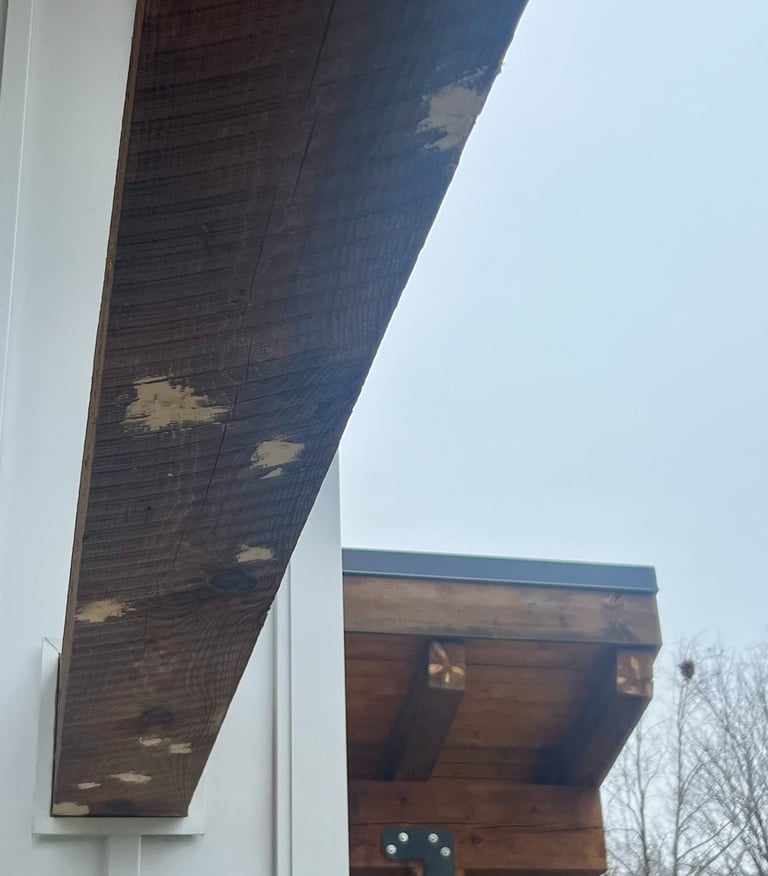
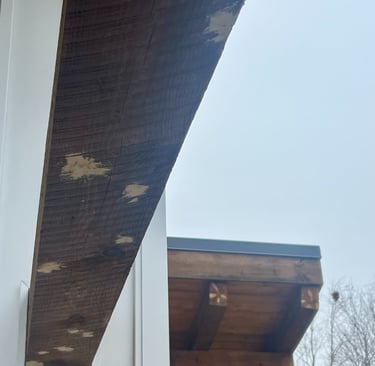
Sanding and Staining: After filling, there’s the cosmetic work. Once the filler hardened, I went over each patched spot with to smooth it flush with the wood surface. Pine is soft, so it only took a bit of sanding to blend the repair. Then I applied a matching stain and sealant over those areas to help camouflage the patches and add some protection. From a few steps back, you’d hardly know there were once dozens of little holes there. Our timber frame looked as good as new – until you get really close and see a sprinkle of round filler dots like a Dalmatian pattern on the wood. I joke that those are “battle scars” of our home’s war with the bees.
One thing to note: as mentioned before, staining the patch will restore appearance but does not guarantee future protection. I am under no illusion here – by only restaining (and not painting), I know the wood is still appetizing to the next generation of carpenter bees. It’s a risk I tolerate for the sake of keeping the natural look. Each fall, I make these repairs, and I mentally prepare to possibly do it all again when spring returns.
Preventative Measures: Hopes for Next Spring
After playing exterminator, I am eager to reduce how many new carpenter bees show up at our house in the first place. This fall, armed with knowledge and some advice from the internet, I took a few additional preventative steps. While I can’t report the results yet, I’ll explain what I’ve done and why – and I’ll update next spring when I see how well they worked (fingers crossed!).
Natural Repellents: As mentioned earlier, certain natural oils are reputed to repel carpenter bees. I read that almond oil and citrus oil are among the top recommendations for discouraging females from choosing your wood for their nests. Supposedly, the strong smell interferes with the bees’ ability to recognize the wood as a good nesting site. Taking that advice, I mixed up a batch of water with a few tablespoons of pure almond oil (and a bit of citrus extract for good measure) and sprayed it liberally on the exposed pine rafters and eaves where we had past activity. I did this in late September and plan to reapply periodically during the spring when the bees are scouting for homes. The idea is to make those areas smell “wrong” or unpleasant to the bees, encouraging them to buzz off elsewhere. Will it actually work? I’m not 100% sure – some sources claim it’s effective, while others say the results are mixed at best. It can’t hurt to try, and at least it’s a non-toxic step.
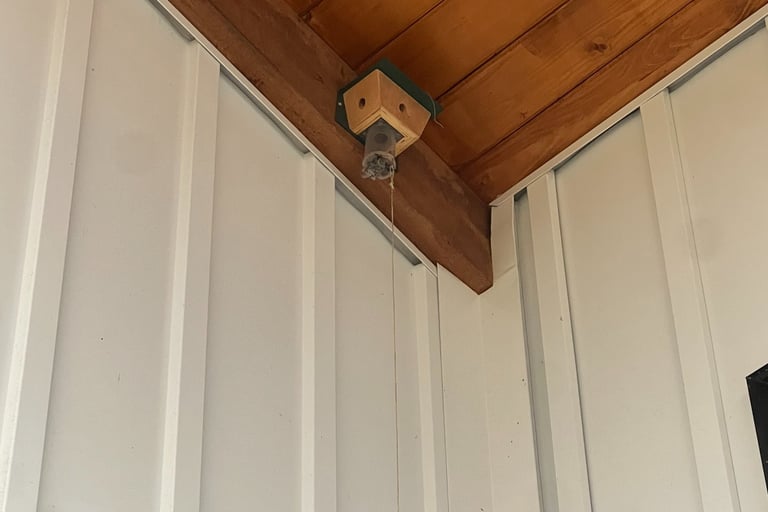
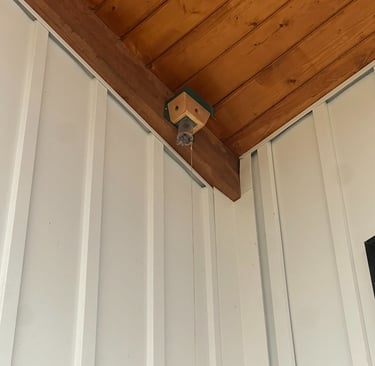
Carpenter Bee Traps: I also kept my carpenter bee traps. These traps are simple contraptions: a piece of wood with angled drilled holes leading into a clear plastic jar. The bees are attracted to the holes (which resemble a tempting nest site), go inside, and then fall into the jar where they get stuck. Over time, traps can catch a decent number of bees; one pest control source noted that traps alone can reduce local bee populations by roughly 70% in a season. However, they’re not a standalone solution – they tend to catch mostly male bees or random explorers and won’t reach larvae in wood. I view them as a supplementary measure to thin out the population and maybe catch early arrivals before they drill new holes. By next May or June, I’ll see if there are a bunch of bees in the jars – which would be both gross and gratifying.

Routine Inspection: Finally, my best preventative measure is simply being vigilant. I’ve gotten into the habit of doing a walk-around inspection of our home exterior every week or two in spring and summer. I look for any new holes, listen for buzzing, and watch for those telltale hovering males that guard a nest. Early detection is key – if I spot a new hole, I’ll treat it that same evening rather than waiting for an entire network of tunnels to develop. After two years, I’ve learned that proactive maintenance beats reacting after the fact.
Conclusion: A Hard-Won Victory (For Now)
As I write this, in the quiet of late fall, our timber frame house is finally free of carpenter bees – at least on the surface. The battle spanned two intense spring/summer seasons, and it taught me a lot about patience and persistence. I went from a panicked new homeowner armed with spray cans and folklore, to a more experienced (and slightly battle-hardened) DIY pest warrior with a game plan. There’s a kind of ironic pride in seeing those little round plugs where holes used to be, knowing I evicted those unwanted tenants with my own two hands (and a trusty coat hanger!).
To fellow homeowners dealing with carpenter bees: I feel your pain. It’s stressful to see your beloved woodwork being chewed up. But take heart – you can fight back and protect your home. Here are my key takeaways from this journey:
· Use the right tool for the job: Insecticidal dust in the holes is incredibly effective at wiping out the bees and their larvae. It’s worth the effort to do this versus just spraying the outside, because it targets the problem at its source.
· Timing matters: Treat in the evening or at night when the bees are inside and sluggish. You’ll have far better results (and fewer angry bees chasing you).
· Finish the job: Don’t stop at killing the active bees. Go back, clean out the tunnels (even if it’s a bit gross), and seal them up properly once you’re sure everything’s dead. This prevents reinfestation in the same spots.
· Protect and maintain the wood: If you’re able to paint without losing your mind over the aesthetics, do it – paint greatly discourages carpenter bees. If not, be prepared to regularly stain and seal, fill gaps or cracks, and perhaps apply repellents each year. Well-maintained wood (with fewer cracks and a coated surface) is less inviting.
· Consider pollinators: Carpenter bees, as destructive as they can be to our houses, are still part of nature’s pollinating team. I’ve made peace with the fact that I’ll never completely eliminate them, nor do I need to as long as they stay out of my structure. Wherever possible, I opt for deterrence over killing. But when they start drilling, I don’t hesitate to take action to defend my home.
For now, I’m enjoying a bee-free winter and hoping that next spring brings fewer unwelcome visitors. I’ll be ready either way – duster in one hand, wood filler in the other. This personal battle has given me plenty of war stories (and yes, a few bee sting stories) to tell, but it’s also given me confidence. If carpenter bees think my home is an easy target, well, they’ve got another thing coming. Good luck to anyone facing the same challenge – you’re not alone, and with a bit of determination, you can win your own carpenter bee war one hole at a time. Stay safe, and may your wood stay solid!
*If you find this information helpful, using our affiliate links above does not impact the price you pay. Amazon does pay us a small commission which is used to help pay for this site. We appreciate your support!